
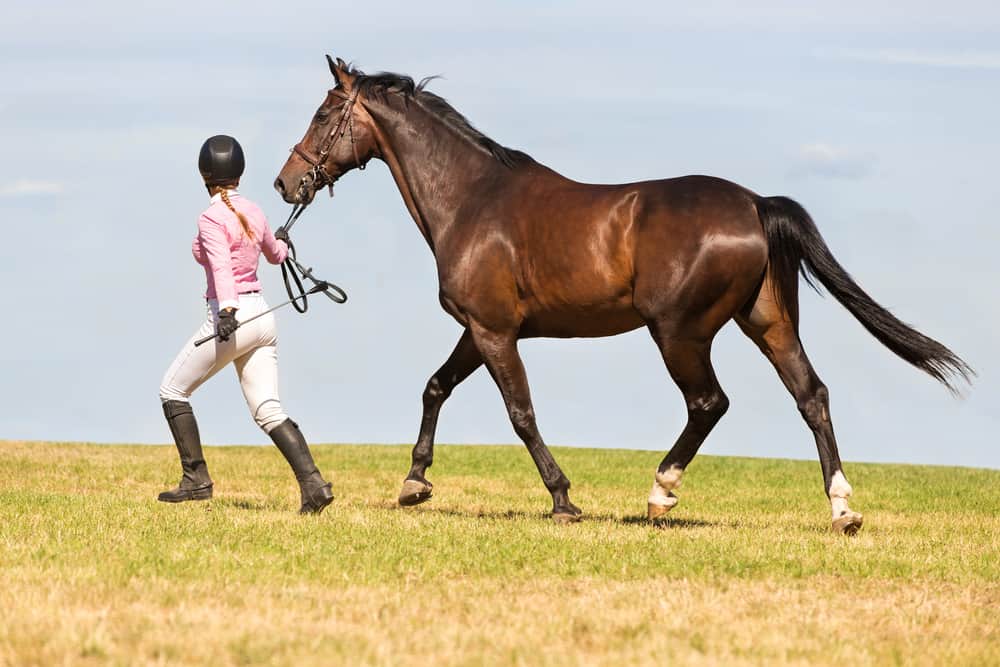
Can you ride a horse with just a halter? Sometimes, but a halter is not automatically a safe substitute for a bridle. It may provide less precise control, and a horse that is green, anxious, strong, unbalanced, unsound, or unfamiliar with the equipment is not a suitable candidate for an experiment. Start with groundwork and ask an experienced instructor to assess the horse, rider, fit, and environment.
If a qualified trainer agrees that it is appropriate, use a correctly fitted riding halter or other purpose-designed bitless equipment, not a loose everyday halter with dangling hardware. Wear an approved riding helmet, use a secure enclosed arena, keep the first sessions at a walk, and have a ground helper. Never treat this exercise as a test of courage or a replacement for competent instruction.
Let’s have a look at how to ride a horse with just a halter and lead rope.
How to introduce halter riding safely
First, some basics; the most important thing riding with a lead rope and halter will teach you is how to be a fully focused rider. This will teach you where your body should be positioned and where you should be looking.
Correct balance comes from a stable seat and core strength which is the foundation of riding without a bridle.
Riding with just a halter and lead rope will teach you to use all your aids and balance your body correctly rather than only relying on the reins.
Riding with just a halter and one rein also helps the rider distinguish between the outside rein and the inside rein. You will be amazed at the difference it makes to your riding skills because you use your legs more than just relying on the reins to guide your horse. Your horse will respond so much more to your seat and leg cues.
Riding with one rein and just a halter is not as easy as just hopping on and having a go. You need to teach your horse the cues and familiarize yourself with the technique before you can go out on the trail.
Do not progress by a fixed timetable. A horse should remain calm, responsive, and physically comfortable in each step, and a qualified instructor should decide whether trot, canter, obstacles, or a trail ride are appropriate. Many horses and riders should stop at walk work; that is a valid safety decision.
Ready to try it out? Here’s how to ride with just a halter
At first, it might be safer and easier to start riding with just a halter in a controlled environment like a riding ring. That way, you and your horse are in a safe, controlled area if your horse has a problem understanding the cues and until you are entirely comfortable.
Your horse needs to learn what is expected of him at first before you can just venture out into the open, riding out on a trail.
Groundwork before mounting
Do not deliberately flick a rope over a horse’s head as a generic desensitization drill. An instructor should demonstrate a quiet groundwork progression: introduce purpose-designed equipment at a standstill, keep the rope organized, watch the horse’s expression and feet, and stop before tension or fear escalates.
Only proceed when the horse remains relaxed and responsive on the ground. If the horse raises its head, backs away, braces, threatens, or becomes difficult to control, stop and get qualified help rather than repeating the stimulus.
At walk and trot
Practice at a walk a few times. Once you have been able to get your horse to walk successfully with only the lead rope and halter, you can then move on to a trot. Practice the trot until you feel your horse is comfortable and understand your cues. Using your legs and body, focus on where you want your horse to go.
When you can do this at the speed of a trot, it means you are well balanced in your seat. Now you can start flicking the lead rope over his head from one hand to the other at the trot as well. Keep practicing this until you and your horse are both comfortable with the lead rope being passed over his head smoothly while trotting at speed.
How to Canter with one rein.
Now let’s try it a little bit faster. Ask your horse for the canter gait by squeezing your outside leg keeping your inside leg at the girth. Once your horse starts to canter, keep your one rein gently against his neck and canter around the ring.
You can practice flicking the rein over his head while at a canter. This will require focus and balance; try to do it a few times until you are comfortable and well-practiced.
The neutral lateral bend stop.
The next exercise is to teach your horse to stop with only the lead rein. This is also called an emergency stop. It is essential to teach your horse when your horse feels the cue of the rein, and he should stop immediately.
Gently pull on the lead rope towards you to turn your horse’s head while at a walk. You need three responses from your horse, stop his feet, bend his head towards you and relax when your horse has accomplished all three, release pressure on the rein, reward him, and let him stand.
The reward gives him time to relax, and he will understand and teach him that he did well.
Keep practicing the neutral lateral bend stop in the riding ring to teach your horse that you expect him to stop immediately when you bend him.
Although it doesn’t happen often, horses have run away with their heads turned sideways with only a halter and lead rope. Make sure you are completely satisfied with your horses’ ability to stop when you ask him to do so before taking him out of the riding ring.
The direct open rein
The following exercise is called the direct open rein, which means to use the rein as a cue to directly turn while using your legs and seat to enforce the cue. To turn right, gently pull on your rein towards you while using your seat and left leg to push from the outside, look in the direction you want to go, and shift weight onto your left foot.
By shifting your weight slightly onto your left foot while you want your horse to turn to the right side, you open and allow his body to move to the right with more ease. Leaning the other way would make it harder for your horse to move over that way.
This concept is hard to understand for motorbike riding enthusiasts as they were taught and lean into the turn.
To turn to the left, follow the same principle, gently pull on the rein while the rein is on the left side, and push with your right leg from the outside while looking at the direction you want to go while shifting weight onto your right foot.
The concept of direct open rein is easy to understand. It connects your horse with your seat and leg aides, which are stronger than the light cue from a rein. You are using every aid to cue your horse in the direction you want your horse to go. Using your legs, seat, body, and eyes makes it simple for your horse to understand.

Why jumping and trail riding are not first steps
Do not add logs or jump obstacles simply because walk, trot, or canter work feels manageable. Jumping raises the consequence of a steering or stopping failure. Only a qualified trainer who knows the horse should approve an obstacle exercise, and normal bridle or bitless equipment with dependable control may be the safer choice.
A bitless setup is not automatically kinder or safer: pressure can still be uncomfortable, and reduced precision can increase conflict. Welfare depends on fit, training, rider hands, the individual horse, and the situation—not on the absence of a bit alone.
Cuing with the outside rein to turn
Riding with only one rein actually makes it easier for a rider to ride in a circle because the rider has only one rein to worry about.
Cuing with the outside rein to turn uses the same principles as a turn with the inside rein, but the rider is now using the outside rein and leg cues to turn the horse instead of pulling on the rein from the inside to steer him into the turn.
This is one of the hardest cues for horse riders to grasp, and circling with the outside rein is equally difficult for the horse to get correct.
This technique requires a high degree of focus on the rider’s part. If you have an issue with your horse bending properly into the turn, set up an exercise by doing a figure of eight to help teach your horse to bend correctly.
When you have mastered the outside rein cue with only one rein and a halter, you will be amazed once you start using both reins again.
Backing up
Teaching your horse to back up with just a halter and one rein is more challenging to train than riding with two reins. If you can teach your horse to back up with only one rein and just a halter, your horse will be backing up a lot easier when riding with two reins.
Start in the riding ring at a standstill, sit deep into your saddle, look straight ahead, and lift your one rein up. Gently squeeze your horse with your legs and seat as if you ask him for a walk.
Gently pull back on the rein while you continue giving aids with your legs, keeping even tension on the rein. You can use a gentle vocal command of “back” at the same time.
Pull back on the rein and then squeeze with your legs and then release the pressure on the rein, do that again and again. Your horse tucks his nose down and should step back with one diagonal pair of legs and then the others.
Keep your hips and back flexible. Don’t stiffen up. Look straight ahead; don’t look down.
Only ask your horse to step back a few steps at first don’t ask too much in the beginning. As you practice and get better, you can ask for a few more steps back.
Release the tension on the rein when your horse got it correct. Then let your horse walk forward a few steps and stop. Reward your horse with a pat on his neck, showing him he did it correctly.
If your horse fails to back up and struggle with the one rein back up command while you are mounted, you can always work from the ground first.
From a standing position on the ground, gently use the command “back” and gently push your horseback with your hand while holding the rein on his chest until he moves back a step. Reward him each time he gets it correct.
Practice this a few times and get back on your horse again and start over again.

Going out on a trail ride with just a halter and lead rope rein
A trail ride is not an automatic next step. A qualified instructor should decide whether the horse and rider have reliable control in the planned environment; many combinations should continue with normal, purpose-designed tack or remain in a secure arena.
If an instructor approves a first outing, use a quiet, familiar route with an experienced group, a communication plan, and a way to return safely. Do not ride alone, near traffic, or in unfamiliar terrain while testing reduced-control equipment.
Riding in a quiet area will allow you and your horse to ride safely confidently without having to worry about outside influences like noisy roads and cars while you two are learning the ropes of riding with only a halter and one rein.
Riding out on a quiet trail a few times will give you the experience and confidence both you and your horse need to move on to the more challenging trail rides.
Be prepared for your trail ride
Don’t go out on a trail ride without these essentials. Other than your usual riding gear and a helmet, here’s a helpful list of a few items you can take along for your trail ride;
- Take an extra layer of clothing in case the weather changes, like a weatherproof jacket.
- Gloves help keeps your hands warm and also protect your hands when you need to handle bushes, rocks or push overhead branches out of the way.
- Bandanna keeps your ears warm in cold weather and slipped over your neck to protect you from the sun. A bandanna acts as an emergency compress or helps tie something to your saddle and can be a hanky all in one.
- The good ole fanny pack is handy to keep a few essential things close to your body just in case you get separated from your horse. Find one that fits tightly to your body without too much bouncing.
- A water bottle that can be tied to your saddle.
- A cantle bag that can fit to your saddle to keep a few items for your horse, like a hoof pick for stones that gets lodge in a shoe. A roll of bandage in case of an emergency and an extra lead rope.
Fanny pack essential list:
- Cellphone to call for help or call your home.
- A pocketknife or survival tool.
- A whistle is more audible and helps call for help if you get separated from your horse or group.
- A flashlight in case you need to deal with an emergency in the dark and help others find you in the night.
- A large plastic garbage bag in case it rains can act as an emergency poncho or ground cover in case you need to sleep overnight. Fold it tightly and secure with an elastic rubber band.
- Pack a small purse size pack of tissues.
- Juice box or a small water or soft drink bottle.
- An energy bar like a Power bar that you can find in health stores. Avoid ones that would melt.
- Lip balm and sample size sunscreen.
Conclusion
Even though riding with just a halter and one rein can be challenging at first, it is quite possible to achieve with proper practice and training. Riding with just a halter teaches you how to balance correctly and use your leg aids more efficiently.
Your horse quickly learns to react and be more responsive to your leg cues when riding with just a halter and one rein. With enough time and training, you and your horse will soon master riding in just a halter and enjoy many happy hours riding out together.
Can You Ride a Horse With Just a Halter? FAQ
Is it safe to ride a horse with just a halter?
It can be appropriate for a calm, trained horse and experienced rider in a controlled setting, but a halter may give less precise control than purpose-designed riding equipment. Ask a qualified instructor to assess the combination first.
Can a beginner ride with only a halter?
Beginners should not use halter riding as a self-taught challenge. Learn steering, stopping, balance, emergency procedures, and safe equipment use with an instructor before considering a change in setup.
Can you jump a horse in a halter?
Do not make jumping the next step. A trainer should decide whether the horse and rider have reliable control, and standard tack or a properly fitted bitless option may be safer for the exercise.
What should you wear when riding in a halter?
Wear an approved riding helmet and secure footwear, use an enclosed area, and have an experienced person on the ground for early sessions. Stop if the horse becomes tense, frightened, painful, or difficult to control.
Related Guides
For broader preparation and safety context, see these related guides:
- Can You Ride a Horse in Trainers? Safety and Footwear Guide
- Can You Teach Yourself to Ride a Horse? Beginner Guide
- Is Show Jumping Dangerous? Risk and Safety Guide
- Can You Jump in a Bitless Bridle? Rules, Fit, and Safety
Sources and further reading
For training progression and safety techniques, see University of Minnesota Extension’s 4-H horse-training guidance. For emergency preparation and knowing when to stop and seek help, see the American Association of Equine Practitioners emergency-preparedness guidance.

Written by
I've been around horses since I was 6 years old and started competing at the age of 9. Horses are my greatest passion and I am thrilled to be able to share my 23 (and counting) years of experience and knowledge with you.
I don’t think the title of your article matches the content lol. Just kidding, mainly because I had some doubts after reading the article.